Posts: 30
Threads: 0
Joined: Jun 2013
City: Las Vegas NV
The electrolysis process only uses baking or washing soda. It is my favorite method for derusting engine blocks and such. I did strip some painted sheet metal and the paint peeled off in sheets.
keithw (CET retired also)
Posts: 16,235
Threads: 563
Joined: Oct 2011
City: Jackson
State, Province, Country: NJ
hey...aren't you close to the Russian border?...oh, I forgot, no, it is the North K who is across the border.....boy do they work wonders for a bottle of a good liquor.....they will blast it and plate it and gild it if this is what they do.
This used to be my preferred method when living over there....
Posts: 1,106
Threads: 88
Joined: Jun 2011
City: Tacoma
State, Province, Country: Washington
I've gotten about as much of the old paint off as I can. Tomorrow: sanding.
I removed the tuner and two of the tube sockets/shield bases. I couldn't remove the LO coil because the connector wanted to spin when I tried to remove the nut.
Much of what is still visible in the pic is the old hammertone that was under all that ugly carp.
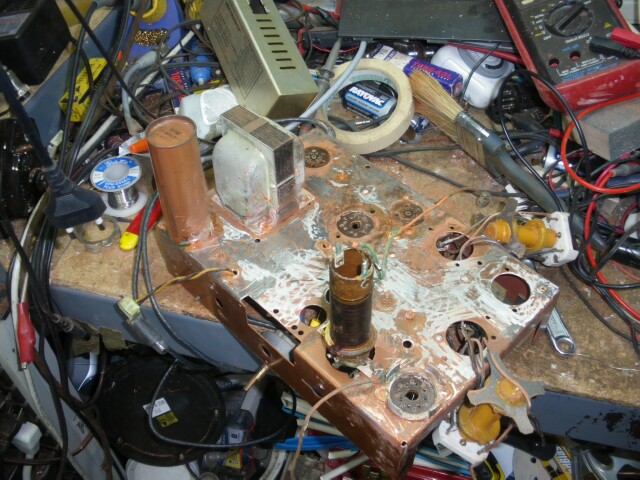
After sanding/masking, I should be able to lay the first coat of primer. I'll leave that to set overnight, and likely until Sunday evening before applying the second coat and then the stainless steel topcoats. I'll try to post pics of each stage.
I also fired up my new ultrasonic cleaner for the first time. I soaked the tuner and several miscellaneous nuts and washers. Nothing got what you would call clean and shiny, but it did do wonders for the operation of the tuner (I had no idea that had a reduction gear!).
Posts: 1,106
Threads: 88
Joined: Jun 2011
City: Tacoma
State, Province, Country: Washington
Morzh,
I'm close enough to Russia (perhaps 200Km) that I often wish I could go visit. I think the closest city to me is Vladivostok. It's well within driving distance, unfortunately, much of that driving would be through the DPRK, and at least for the time being, that's not happening.
It's interesting that Asia Highway 1 (which is supposed to run from Tokyo to Istanbul, with part of the trip obviously by ferry) is supposed to go through the DPRK. One wonders about access to fuel and other services while traveling through a country that really doesn't even want foreigners there at all.
Posts: 143
Threads: 11
Joined: Dec 2013
City: Ithaca NY
Brenda:
I like the "neat and orderly" workbench!
Herb S.
Ithaca NY
Posts: 4,808
Threads: 54
Joined: Sep 2008
City: Sandwick, BC, CA
Baking soda and washing soda, there isn't anything special about either one. No fancy chemicals, you can also use TSP or lye as an electrolyte.
Regards
Arran
Posts: 1,106
Threads: 88
Joined: Jun 2011
City: Tacoma
State, Province, Country: Washington
"Neat and orderly workbench"... ROTFLMAOBHOF!!!
I've set tools down for a moment and never found them again. My problem is that I have so many irons in the fire at one time.
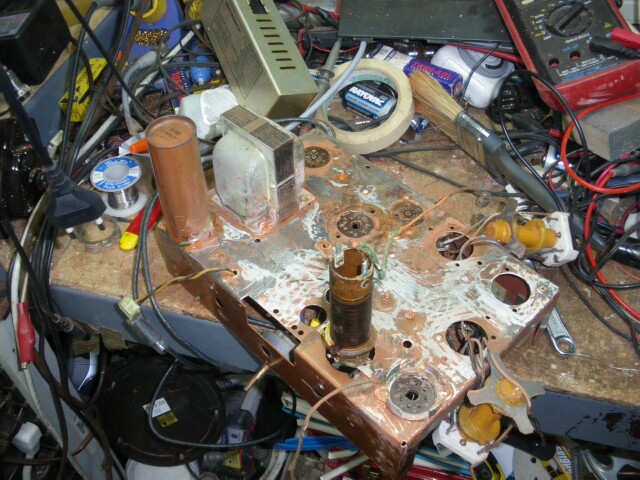
Changed my painting schedule a bit, because the primer dried pretty fast.
Here is the last pic before laying the primer.
First of two coats of primer.
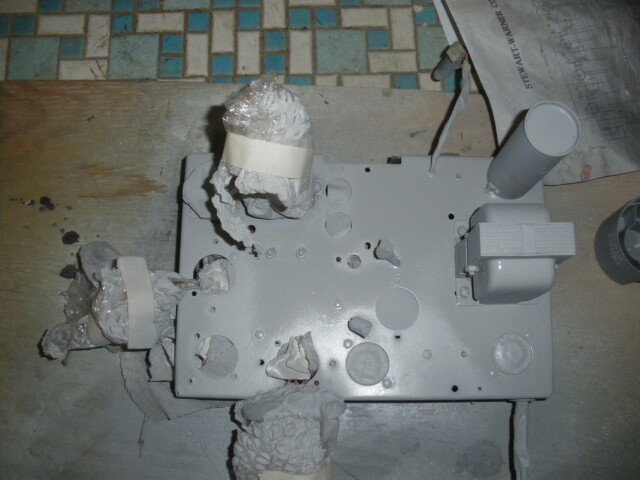
After primer, I painted the transformer shell black. A bit of overspray, but I figured that the stainless steel paint would cover that up. Not quite...
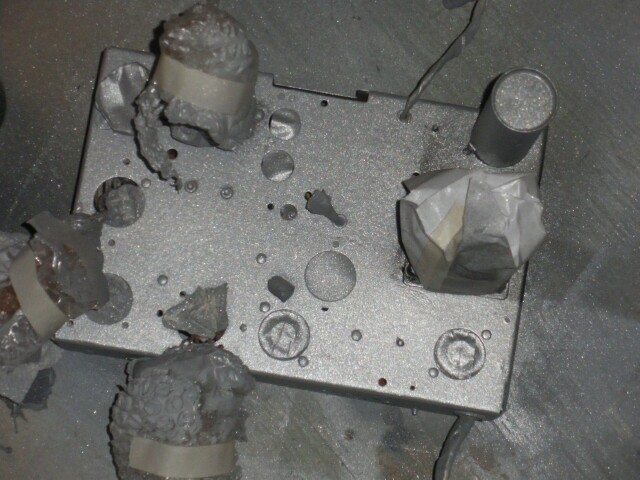
I'll likely leave this to set overnight, and most of tomorrow, before starting to reassemble the set.
Posts: 143
Threads: 11
Joined: Dec 2013
City: Ithaca NY
Interesting seeing the paint job. I have never tried to paint a chassis before. I've heard people say they use Bondo to fill in the rust pits first.
Did you have to do any of that?
My bench can get just as full until finally it gets so bad I get fed up, stop what I am doing, and do a complete cleanup that can sometimes last for hours by the time everything gets put away again.
Herb S.
Ithaca NY
Posts: 1,106
Threads: 88
Joined: Jun 2011
City: Tacoma
State, Province, Country: Washington
Herb,
I'm the same way. Just that I have a bit more patience. 
Posts: 1,106
Threads: 88
Joined: Jun 2011
City: Tacoma
State, Province, Country: Washington
Well, it's finished, at least very very close. The chassis is done, and reassembled. Amazingly, I didn't even have to realign it, everything was still perfect. I'm very happy.
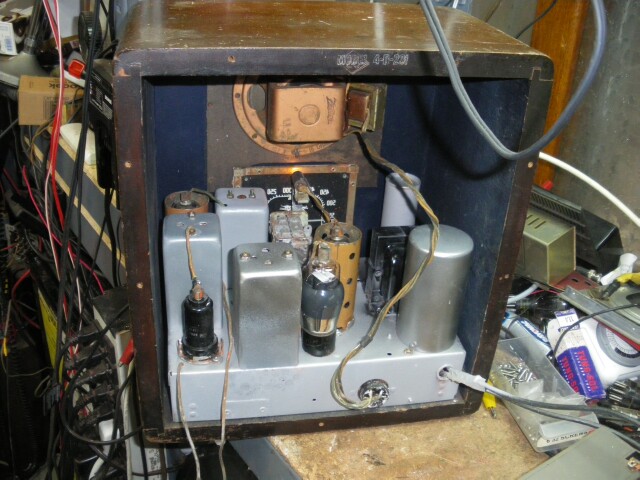
Only thing I still need to deal with is that the insert on one of the original Zenith knobs got lost somehow. I have these that are the very same knob, but a different color. (Unless, of course, the ones on the radio weren't originals, either). Ah, I just found repros of the proper knobs at Renovated Radios, and ordered them.

As I said, I'm not sure I'll bother with redoing the cabinet. It's got some minor blemishes, but not bad.
(This post was last modified: 02-09-2014, 04:22 AM by BrendaAnnD.)
Posts: 143
Threads: 11
Joined: Dec 2013
City: Ithaca NY
Wow, that went back together fast! Nice job Brenda!
Herb S.
Ithaca NY
Posts: 1,106
Threads: 88
Joined: Jun 2011
City: Tacoma
State, Province, Country: Washington
Thanks. I'm pretty pleased with it. This is the first time I've done this kind of work on a chassis.
Posts: 143
Threads: 11
Joined: Dec 2013
City: Ithaca NY
OK, I also have a few radios with rusty chassis. So far I have mostly left them alone. A few I have applied naval jelly etc... but I really should start
cleaning and re-painting the worst ones.
My main thing is getting the electronics working, cosmetics have always
been 2nd priority for me. After seeing some of the results Phorum members
are getting, I need to go that direction more I think!
Posts: 16,235
Threads: 563
Joined: Oct 2011
City: Jackson
State, Province, Country: NJ
Brenda,
I said that before and will say again - my hat's off to you so many times it just falls all by itself 
Seriously, your persistence and patience is an inspiration.
Wherever all that energy is coming from, keep eating it!  (or doing it).
Posts: 61
Threads: 2
Joined: Aug 2013
City: Renton, Wa
Very nice Brenda--your work is amazing
Users browsing this thread: 2 Guest(s)
|
|
Recent Posts
|
|
Philco 46-480 Electronic Restoration
|
| I’ve asked if they accept PayPal as payment so that I can contest it if the part doesn’t arrive.jrblasde — 12:46 PM |
|
Philco 46-480 Electronic Restoration
|
| Make sure th eperson who answered is not a scammer (lots of these there now) and the Trus A S, whoever they are and wher...morzh — 12:38 PM |
|
Philco 40-120C Filament Wiring
|
| I would disregard everything that is there now. I do not know who and when changed it.
1. Make sure that what you thi...morzh — 12:36 PM |
|
Model 27-84 BUZZ?Humm?
|
| Depends on the type of hum. SOme is made by outside devices.
Try installing an X-cap (0.2-0.5uF) across the AC line, ...morzh — 12:23 PM |
|
Philco 40-120C Filament Wiring
|
| Thank you for your replies.
That is the correct schematic and pin out diagram for the rectifier. The resistance acro...bluecap — 11:01 AM |
|
Philco 46-480 Electronic Restoration
|
| Late last night a guy reached out in response to my posting on the Antique Radio Forum and suggested I contact Trust Aut...jrblasde — 11:01 AM |
|
Philco 630csx power cord
|
| Have you opened up that plug? It may be that the third wire is connected to that brass stud on the side of the plug and ...Arran — 02:57 AM |
|
Model 27-84 BUZZ?Humm?
|
| I would have to look at the schematic but it's not uncommon in 1930s AC radios to have the negative of one filter cap co...Arran — 02:46 AM |
|
Model 27-84 BUZZ?Humm?
|
| Hello Bruce,
First all do mean a 37-84b ?
Did you take any before and after pictures ?
is it a buzz like when you touch...radiorich — 01:59 AM |
|
B&K 1077B no video - problem solved
|
| Hello Tim,
Yes, I even check all of my replacement parts when I install them and I too had a capacitor go bad not long a...radiorich — 01:54 AM |
|
Who's Online
|
There are currently 2962 online users. [Complete List]
» 3 Member(s) | 2959 Guest(s)
|
|
|

|
 
|


![[-] [-]](https://philcoradio.com/phorum/images/bootbb/collapse.png)


